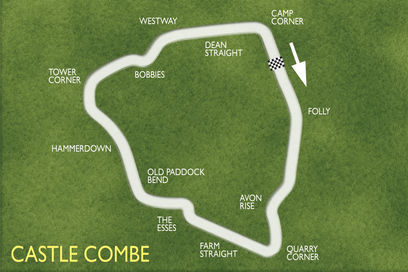
 Castle Combe Circuit opened just 18 months after Silverstone in the summer of 1950, making it one of the longest established circuits in the UK. Until 1999, the circuit followed it’s original layout, around the perimeter of the old air base. In that first year, a young Stirling Moss won a race and over the next few years, names like Mike Hawthorn, Colin Chapman, Les Leston, Roy Salvadori and John Surtees thrilled huge crowds. By the 60’s, several planning constraints had seen the circuit become run down and although the old Brands Hatch company, Motor Circuit Developments tried hard to develop meetings in the early 70’s with Formula 5000 and other major events, planning problems prevented long term development. However in 1976, the circuit lease was obtained by the current owners and the long road to developing the circuit as a modern national racing venue began. Nigel Mansell, Ayrton Senna, and David Coulthard all won races in the 70’s and 80’s, and by the 90’s, the circuit hosted rounds of most of the national championships. Today, the circuit boasts modern facilities for competitors and spectators, and the resurfaced and now reshaped circuit providing what is generally recognised as providing the closest circuit racing in British motorsport.
Folly:
The first corner after the start/finish straight is Folly, which is little more than a flat out right hand kink. The track is quite bumpy around here, and on the left, shortly before Folly is where the pit exit joins the main circuit, so beware of cars joining the track. The turn in point is shortly after the corner board marker on the left. Try to use all of the track on the exit – there is plenty of space to return smoothly to the right for Avon Rise.
Avon Rise:
Avon Rise complicates the entry to the next corner proper, Quarry, as, in most production-based machinery, the braking point for Quarry would be at the top of Avon Rise. As the name indicates, though, Avon Rise is a gradient change (and a shallow left hander)and to brake at the top of it would only result in locked wheels (or ABS cutting in).
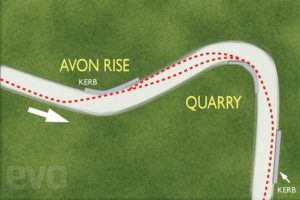 There are three main approaches that can be taken to combat this, all of which influence the line that will be taken through Quarry:
1) Move to the right of the track prior to Avon Rise. Brake shortly after Avon Rise begins, but come off the brakes before the top. Head for a slightly later apex than the geometric one. Brake when over the rise to slow the car sufficiently for Quarry. The amount of power that may be applied whilst going over Avon Rise will vary according to the car, but it is important to apply some power in order to balance the car.
2) Follow the same approach as 1) but do not brake before Avon Rise. This leaves very little space for braking to sufficiently slow the car for Quarry, but it is possible in some cars, particularly lighter ones.
3) Take an early apex at Avon Rise, followed by a straight line to an early apex at Quarry. This maximises the braking distance available after Avon Rise and enables Avon Rise to be taken flat. Exit speed is compromised, however, although this may be an acceptable trade-off for more powerful cars.
The approach will vary depending on the car’s weight and power. Lighter GT cars, such as Radicals, will nearly always take 3), whereas heavier saloon cars will require braking prior to Avon Rise and will usually follow 1. 2 is rare, but is possible, especially from a standing start, where entry speeds are lower.
Quarry:
The line taken through Quarry will largely depend on how Avon Rise was tackled. Quarry is a long, fairly slow right hander and thus has a late apex, (providing approach 1 or 2 has been taken) some two thirds of the way round the corner. Use all of the track on the exit, but beware of a slightly bumpy exit curb.
The Esses:
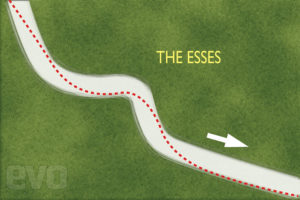 After the fairly short Farm Straight is the first set of chicanes, the Esses. Move towards the centre of the track; the braking point is, depending on the cars’ power and weight, slightly before the corner marker board; the turn in point is slightly beyond this. Try to carve as straight a line as possible between the two apexes, using plenty of power and all of the road on the exit – there is sufficient space to return to the left for Old Paddock.
Old Paddock:
Move smoothly to the left after the Esses, then, from the centre of the track, aim for the geometric apex of Old Paddock. There is no need to move fully to the left prior to this corner. Don’t hold the car too tight on the exit – let it drift out to the exit kerb. In the dry there are very few cars that cannot take this corner flat, so don’t be afraid of using full throttle all the way through here.
Hammerdown:
After the exit of Old Paddock move back to the right for the left hander, Hammerdown. This is taken flat, with a late apex to enable the car to be straight for the next corner, Tower.
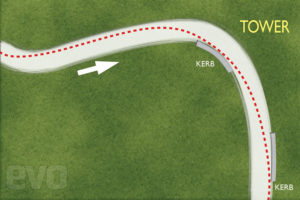 Tower:
After Hammerdown, keep the car to the left of the track for the entry to Tower. The braking point is a few metres before the corner marker board, although this wil vary depending on the car. The turn in point is quite late on heavier saloon cars, but earlier on single seaters and GTs, which also affects the lateness of the apex. Exit speed is not as crucial as other corners as the straight that follows Tower is very short.
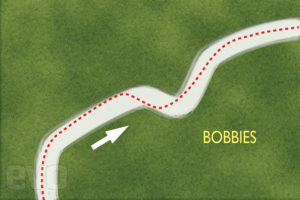 After a short straight with barely enough time for a gear change, the second chicane, Bobbies is reached. The braking point for most cars is where a concrete strip ends on the left hand side of the track. Move towards the middle of the track before making a smooth turn into the first part of the chicane. A fair amount of power can be applied after clipping the first apex, so ensure that a straight line is held to the second apex and all of the track is used on the exit. Let the car drift to the left through Westway – don’t hold it too tight as this will only slow the car down.
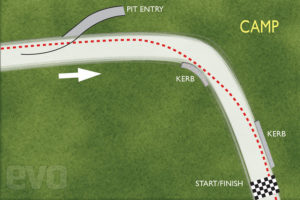
Camp:
Camp is the most important corner on the circuit as it is followed by a long section that is taken at full throttle. The braking point is around where the pit entry road leaves the track; some cars will need braking at the beginning of this, others will not require braking until the entrance has been passed. Turn in is late – adjacent to the markings for the last place on the grid on the left. The apex is very late – almost three quarters of the way around the corner. Ensure that all of the track is used on the exit – many cars spin here from being held too tight.
Images courstey of EVO Magazine.
On the day of the event, enter the grounds via the Competiors Entrance and use the Paddock area as a base. The Race Control Tower is the signing in point. The cars are inspected at the Scrutineering Bay and the briefing as held in the Tavern Club House.
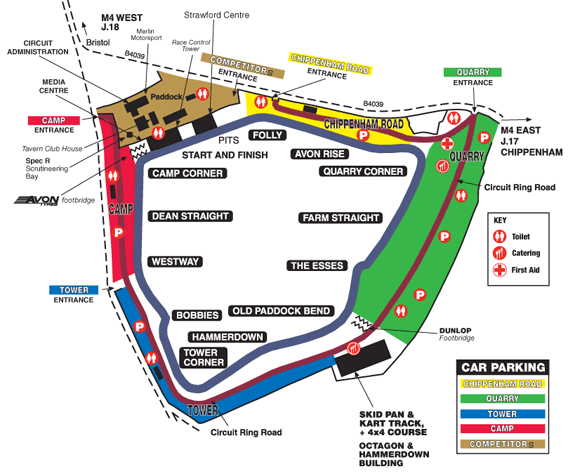
Here is a true reflection of what the circuit looks like from the air.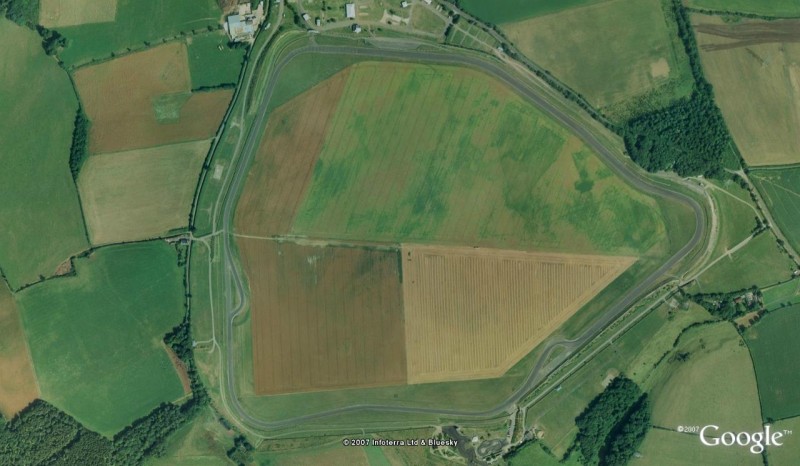
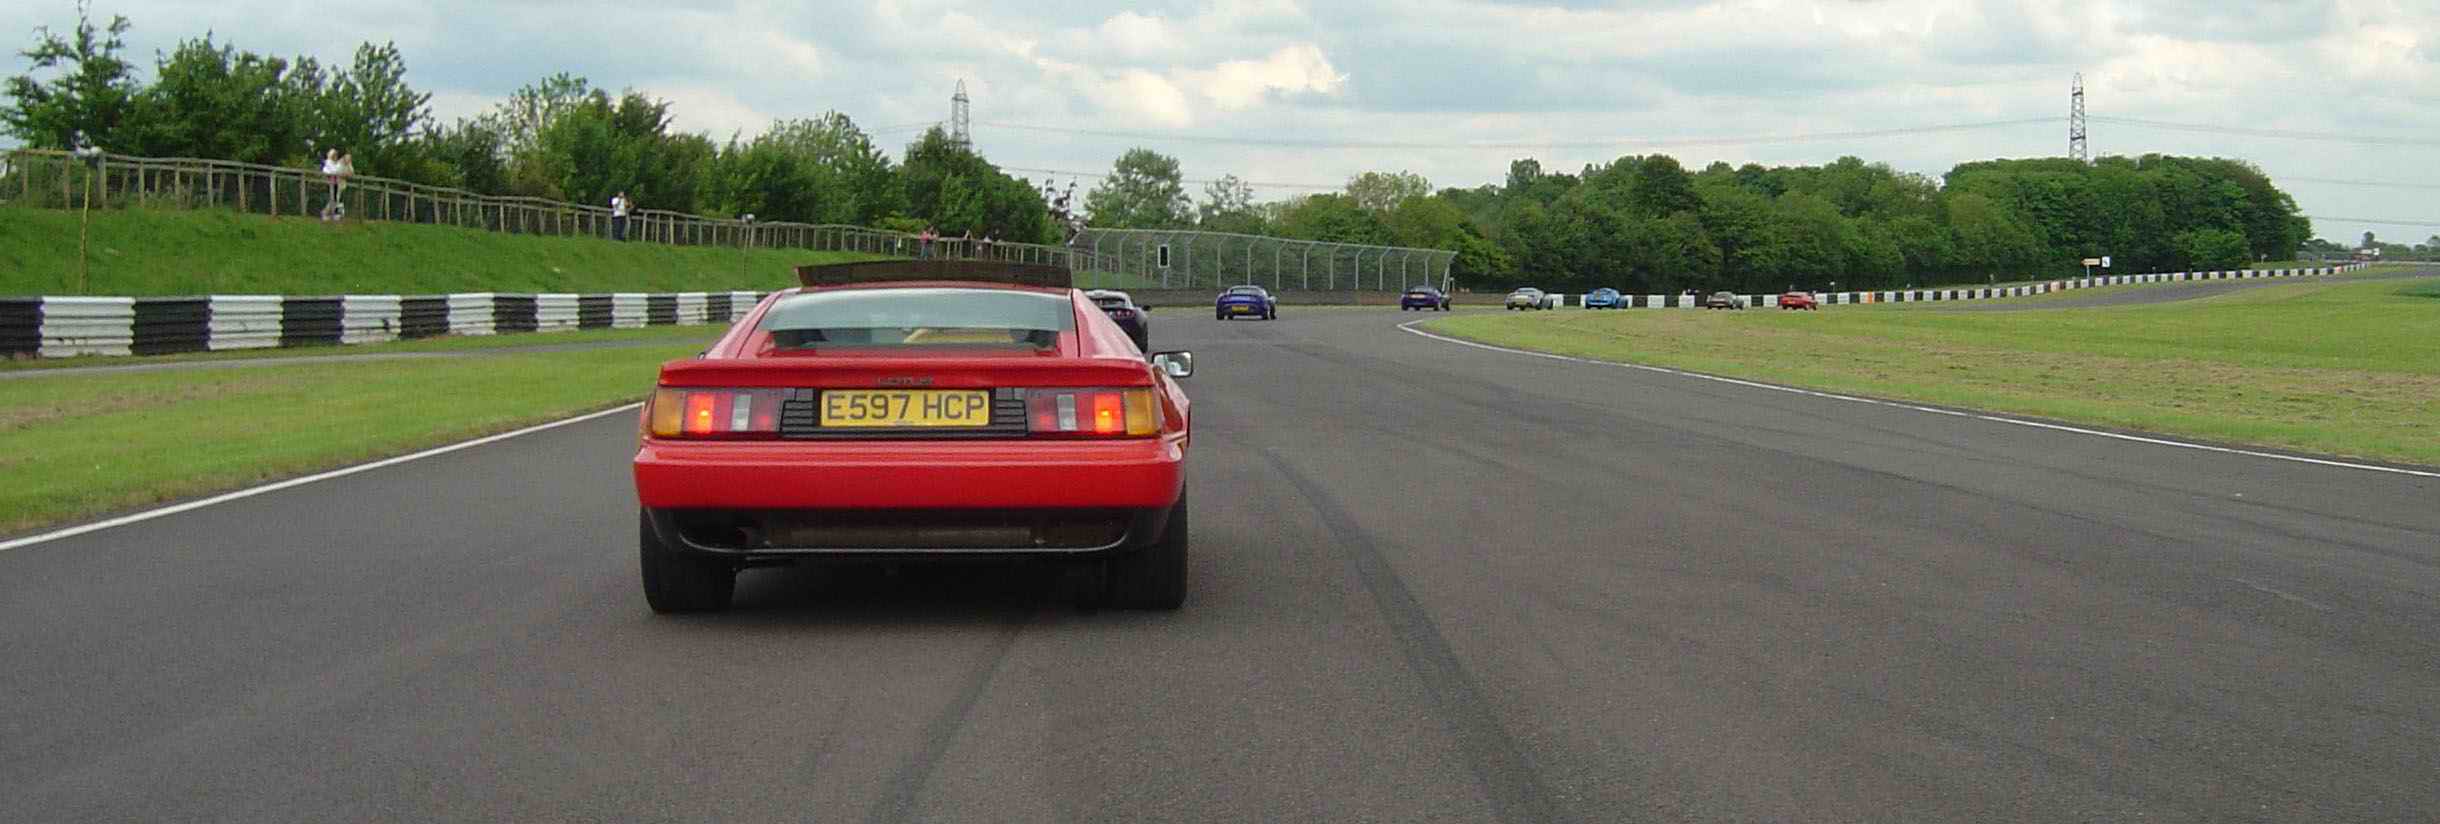
And this is what it looks like while driving on the circuit!
